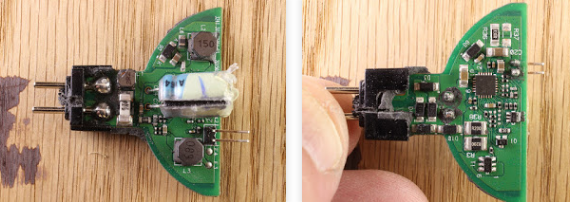
A 2-channel receiver that can save your old Motorola TX

1featured-2

Boris Landoni writes about a new open source project 2-channel receiver that can save your old Motorola TX:

A 433,92 MHz Receiver that can be paired with a maximum of 10 Motorola TX each with relay outputs that can be set both in monostable or bistable mode.

Although we have had high security encoding for several years, based for instance on rolling-codes, a lot of remote controls and especially those installed long time ago in houses and other places for opening gates, are based on fixed and relatively simple encoding like the MM53200 of former National Semiconductor and the Motorola MC14502x; the latter had two new elements at the time of its introduction, that were the high (for the times) number of combinations allowed (19,683) and the three-state encoding (each encoding input of the encoder and of the decoder would allow three logic levels and required special three-state dip-switches).

More details at open-electronics.org.

TB timer – Timed camera cable release

pics-TB-Timer-v1.00-Prototype-Labeled-600

Steve Smith has published a new build:

It’s taken some research but I have built a prototype with my trusty ARDX Arduino Uno kit
Currently, the device changes mode with a press of the mode button which will later be incorporated in a suitable rotary encoder. I modified the prototype’s rotary encoder to remove the detents and therefore, have continuous motion rather than be stepped. When stepped, the value hops by two at a time. The ‘B’ and ‘T’ modes both operate as expected and at the moment, the rotary encoder changes a value in ‘TB’ mode and is displayed on the OLED display. the outputs are opto-isolated so will appear as switches to the camera. Although I’ll be using the cable release with a Canon DSLR, it should be very easy to make it work with other DSLR makes.

Project info at projectavr.com.

MCUXpresso IDE tutorial series

blinky-on-lpc800-dip

Erich Styger has made a series of tutorial blog posts on using the new NXP MCUXpresso IDE.

Published so far are:

  • MCUXpresso IDE: Unified Eclipse IDE for NXPs ARM Cortex-M Microcontrollers
  • MCUXpresso IDE: S-Record, Intel Hex and Binary Files
  • MCUXpresso IDE: Adding the Eclipse Marketplace Client
  • MCUXpresso IDE: Importing Kinetis Design Studio Projects
  • MCUXpresso IDE: Installing Processor Expert into Eclipse Neon
  • MCUXpresso IDE: Terminate and Disconnect a Debug Session
  • MCUXpresso IDE: Blinky the NXP LPC800-DIP Board

More details at mcuoneclipse.com.

RX/TX sequencer

20170507_Sequencer_001-768x512

Lukas Fässler has designed and built an RX/TX sequencer based on a PIC16F18325,  that is available on github:

Much like the beacon keyer presented here earlier, this RX/TX sequencer is a simple but useful little device. Its typical use is in ham radio applications when a separate power amplifier (PA) and/or a sensitive low-noise pre-amplifier (LNA) is used. Care has then to be take to safely transition between RX and TX states – and that’s where this sequencer comes in.

Project info at Soldernerd homepage.

Check out the video after the break. Continue reading “RX/TX sequencer”

Bus Pirate PCB build

BusPirate

Ben Kazemi shares his latest build a Bus Pirate v3.6a PCB.  The Bus Pirate is an open source hacker multi-tool that talks to electronic stuff.

My latest build – i have to say the yellow soldermask is prettier than it looks on the photos, i also like to think i earnt something special for having ENIG pads :p

Get your own handy Bus Pirate for $30, including world-wide shipping. Also available from our friendly distributors.

Deepace KC901V 6.8GHz handheld network analyzer review, teardown and experiments

pics-KC901V-e1494792778324


Teardown and analysis of Deepace KC901V 6.8GHz handheld network analyzer from the The Signal Path:

In this episode Shahriar reviews the Deepace KC901V 6.8GHz handheld network analyzer. This battery-powered instrument is an RF multi-instrument integrating VNA, spectrum analyzer, field strength meter, and a low-frequency signal generator. It can also perform signal port vector measurement and 2-ports simple vector network analyzing (S11, S21).

More details at The Signal Path homepage.

Check out the video after the break. Continue reading “Deepace KC901V 6.8GHz handheld network analyzer review, teardown and experiments”

Pulsecounting and deepsleep based IoT water meter

IMG_20160830_001006

Tisham Dhar has written an article detailing his pulsecounting and deepsleep based IoT water meter project:

I admit to being a tiny bit obsessed with monitoring utility bills and gathering data on my usage patterns blow-by-blow. The energy monitoring has reduced my electricity bills, so I wanted to have a go at the water usage. Granted a lot of the water bill is fixed supply costs and sewerage charges which I can’t do much about.
A while ago I made some pulse counting breakouts with the DS1682+ RTC. I have finally got a chance to put them to good use interfacing with my mechanical water meter. The water meter has a spinning permanent magnet and in principle this can trigger a reed switch and generate pulses for accumulation by the RTC.

More details at Tisham Dhar’s blog.

A DC motor controller with control LEDs

featured-1

Boris Landoni writes about a new open source project a DC motor controller with control LEDs:

It can be controlled through logic levels to set the speed and the direction of the rotation of CC brushed motors and stepper motors; outputs have LEDs indicating the rotation direction.

The circuit board we are presenting this time is based on the dual-bridge driver L298N, in a traditionally mounted version in a Multiwatt container with 15 staggered pins; it has two terminal blocks for attaching to DC motors or the coils of a bipolar stepper motor and a terminal block for powering logics and motors. Each of the two output channels of the circuit can provide a maximum current of 2 A, which is enough to drive two 2 A direct current motors or a bipolar stepper motor absorbing 2 A per phase.

More info at Open-electronics.org.

Free PCB Sunday: Pick your PCB

BP-600x373

We go through a lot of prototype PCBs, and end up with lots of extras that we’ll never use. Every Sunday we give away a few PCBs from one of our past or future projects, or a related prototype. Our PCBs are made through Seeed Studio’s Fusion board service. This week two random commenters will get a coupon code for the free PCB drawer tomorrow morning. Pick your own PCB. You get unlimited free PCBs now – finish one and we’ll send you another! Don’t forget there’s free PCBs three times every week:

Continue reading “Free PCB Sunday: Pick your PCB”

App note: Active capacitor discharge circuit considerations for FPGAs

an_diodes_an1140

Power down sequencing and discharging on FPGAs app note from Diodes Incorporated. Link here (PDF)

FPGA’s need the different power rails to be powered up and down in a defined sequence. For power down, each sequenced rail needs to be fully off before the next rail is turned off. With large high speed and high functionality FPGA’s, the power rails have large bulk capacitors to be discharged quickly and safely within a total time of 100ms and up to 10 rails each to be discharged within 10ms.

This application note shows a methodology and considerations for safe open ended shutdown to be controlled by a power sequencing circuit and using correctly chosen MOSFET to discharge the capacitor bank.

App note: Power supply rejection for low-jitter clocks

an_sillabs_an491

Method of rejecting noises from power supply, an app note from Silicon Labs. Link here (PDF)

Hardware designers are routinely challenged to increase functional density while shrinking the overall PCB footprint of each new design. One significant challenge is minimizing clock jitter through careful board design while meeting the design’s functional and space requirements. Since jitter is a measure of signal fidelity, it requires an understanding of diverse analog concepts, such as transmission line theory, interference, bandwidth, and noise, in order to manage their impact on performance. Among these, density impacts sensitivity to external noise and interference the most. Since noise and interference are everywhere and since multiple components share a common power supply, the power supply is a direct path for noise and interference to impact the jitter performance of each device. Therefore, achieving the lowest clocking jitter requires careful management of the power supply. Sensitivity to power supply is commonly referred to as power supply ripple rejection or power supply rejection ratio (PSRR). For jitter, ripple rejection is more appropriate.

Adjustable constant current source

pics-33749838064_45e25d4fed_z-600

Dilshan Jayakody has published a new build:

The current source introduced in this article is capable to handle current up to 6A with maximum input voltage of 50V. This is an operational amplifier based adjustable current source and it uses LM358 in a general voltage follower configuration. To handle large currents we use four 0.1Ω 20W resistors as “load resistor”, and those load resistors are drive through pair of 55N06 N-channel MOSFET transistors.
The power supply unit of this project is build around 9V x 2 (2A) step-down transformer and it is design to get regulated 12V DC voltage. In our design this 12V power source is used to drive LM358 Op-Amp and 12V cooling fan.

More details at Dilshan Jayakody’s blog. Project files are available at elect.wikispaces.com.

3D POV display

pics-F87MI9MJ26F2M38-600

Gelstronic shared detailed instructions of how to build this 3D POV display, project instructables here:

In my project i use a spinning helix of LED strips. There are a total of 144 LEDs that can displays 17280 voxels with 16 colors. The voxels are arranged circularly in 12 levels. The LEDs are controlled by only one microcontroller. Because i have used the APA102 LEDs i need no additional drivers or transistors. So the electronic part is easier to build. Another advantage is the wireless electrical supply. You need no brushes and there is no friction loss.

Check out the video after the break.

Continue reading “3D POV display”

Free PCB coupon via Facebook to 2 random commenters

BP

Every Friday we give away some extra PCBs via Facebook. This post was announced on Facebook, and on Monday we’ll send coupon codes to two random commenters. The coupon code usually go to Facebook ‘Other’ Messages Folder . More PCBs via Twitter on Tuesday and the blog every Sunday. Don’t forget there’s free PCBs three times every week:

Continue reading “Free PCB coupon via Facebook to 2 random commenters”

Duck DNS ESP8266 mini WiFi client

pics-duckdns_mini_standalone_client-600

An ESP8266 Duck DNS client from Davide Gironi:

It is powered by USB, it can also be powered by the router USB port.
It’s built on a pretty old ESP-01 board.
It has two led, one is the ESP-01 WiFi connection status embedded one, the other is connected to the GPIO2 port, and it’s used for the DNS update status.

Project info at Davide Gironi’s blog.  Code is available on github.

Check out the video after the break.

Continue reading “Duck DNS ESP8266 mini WiFi client”

Creating custom 3D printed LED bar graphs

01.banner.DSC_1663

Glen Akins has a nice build log on his 3D printed LED bar graphs:

While building my zombie containment unit, I decided I wanted some LED displays or bar graphs to complement the containment status video running on the smaller secondary video monitor. Some other containment units used LED air pressure gauges from eBay. I wanted to achieve a similar look, but I also wanted my gauge to be software controllable so I could change the number of segments lit in response to events in the playback of the two videos. I decided it was time to build my own LED bar graphs.

More details at Glen’s blog.

Programmable LED dimmer

20170423_ProgrammableDimmer_041

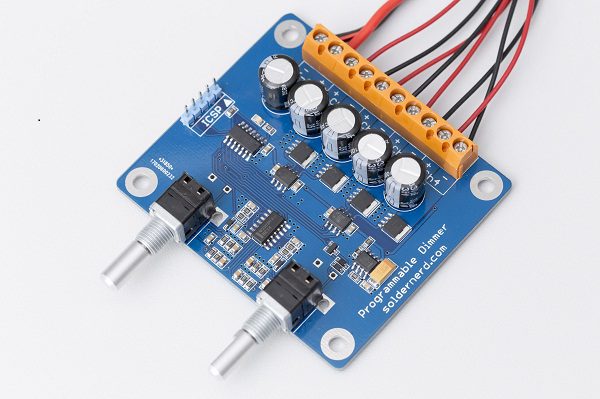
Programmable LED dimmer from Soldernerd:

Around one and a half years ago I’ve designed and built various LED dimmers for both white and RGB LEDs. Then late last year someone approached me asking if I could make an RGB dimmer for him, too. But my designs were really tailored to their specific applications and built with home-made, i.e. milled PCBs which are time-consuming to make. So I decided to make a more universal version based on a proper, etched board which could be built in a small series and used for all kind of applications, both white and RGB. The result is this versatile, programmable 4-channel dimmer.
The design is based on my previous RGB dimmer but with a number of improvements.

Project info at Soldernerd homepage and the GitHub repository here.

Dynamic lights with CMOS integrated

DSCF3029

Nicu Florica @ Arduinotehniq writes:

Inspired by a 1990 article from Tehnium anual magazine, I revisited an old schematic of mine designed for dynamic “games” without the need for microcontrollers. A few years back, I was in search of a straightforward solution for an automatic game system, and this schematic came to mind. I refined it, stripping it down to the essentials, much like how a casino utan svensk licens streamlines the gaming experience by cutting through the red tape and offering a straightforward array of games without the constraints of Swedish regulation. This simplification, akin to choosing an unlicensed platform, allowed me to focus on functionality over complexity.

More details at Arduinotehniq blog.

Check out the video after the break. Continue reading “Dynamic lights with CMOS integrated”

Build an open source laser reflection barrier

pic1

Boris Landoni from Open Electronics writes about an open source project laser reflection barrier:

It allows us to detect the presence and passage of an object thanks to the combination of a laser diode which emits a light ray and a phototransistor which detects reflected light.

Robotics applications and industrial control systems normally make use of optical systems in order to detect proximity and passing of objects, taking advantage of light interruption or light reflection on a surface of the object to be detected. In this article, we want to show you the project of a laser barrier: however this is not an interruption-type barrier, which needs the object to be detected to pass through a meter and a photodetector, in fact, this is a reflection barrier: in our circuit, a laser projects a ray of focused and infinitely-collimated light and any object passing in front of it will reflect a portion of it, which will be intercepted by a lens on its way back and focused on the sensible surface of a photo-sensible component.

Full details at Open Electronics project page.