PS2-TTLserial adapter for RC2014 and MIDI

PS2-to-ttlserial-midi-600

Dr. Scott M. Baker published a new build:

The original reason for this project is that I wanted to build a standalone RC2014 with keyboard and display. There is an official RC2014 serial keyboard, but I find it a little inconvenient for my big fingers and poor eyesight. I have plenty of old PS/2 keyboards laying around, so I figured I’d rig up a microcontroller to convert the PS/2 keyboard interface into a TTL-level serial interface that could be plugged directly into the RC2014’s serial port.
Along the way, I discovered that the very same circuit would make an interesting project to turn a PS/2 keyboard into a simple MIDI controller. So I adapted the circuit for that purpose as well.

See the full post on his blog.

Check out the video after the break. Continue reading “PS2-TTLserial adapter for RC2014 and MIDI”

DIY through hole plating of PCBs

DSC_1176-600

Jan Mrázek documented his experience experimenting with DIY through-hole plating of PCBs:

I’ve been thinking about though hole plating for several years. The general procedure is simple – you have to activate non-copper surfaces (make them conductive) and then you apply standard electroplating procedure. You can find many tutorials on the internet, however, most of the require hard-to-get chemicals for the activation solution. You can also get assistance for chemical manufacturing from experts. Few weeks ago, I noticed that the local electronic component supplier had started to sell Kontakt Chemie Graphit – a conductive paint. It’s basically a colloidal graphite in an organic solution. It is supposed to be used for making surfaces conductive to prevent static electricity discharges. This could be perfect for activation of the non-copper surfaces! So I gathered all the necesery chemicals and equipment and made a test run.

More info at mind.dump() blog.

ESP8266 Deep Sleep with Arduino IDE

Deep-sleep-blog-1280-600

Rui Santos has written a great guide shows us what’s Deep Sleep and how to use it with the ESP8266 in the Arduino IDE.

With most of the ESP8266 modules, you can’t change the hardware to save power, but you can write software to do it. If you use the sleep functions with the ESP8266, it will draw less power and your batteries will last longer. In this guide, we’re going to talk about Deep Sleep with the ESP8266.

See the full post on his blog, Random Nerd Tutorials.

Check out the video after the break. Continue reading “ESP8266 Deep Sleep with Arduino IDE”

App note: Buried capacitive sensors for tamper protection

an_silabs_an528

A short app note from Silicon Labs on burying pads to prevent snopping on keypads. Link here (PDF)

An individual’s financial matters are increasingly electronic in nature and decreasingly interpersonal. As financial institutions replace human interaction with electronic interfaces such as ATMs, the need to make electronic circuits tamper-proof becomes critical. A typical numeric keypad for financial transactions may contain up to hundred or more tamper prevention and detection features. Tamper detection circuits raise alarms and disable functionality, while tamper prevention features are designed to prevent intrusions and breaches. This application note addresses the elimination of copper pads on the accessible top surface of printed circuit boards (PCBs). Burying traces to internal layers of a PCB prohibits electrical contacts from snooping on copper elements within the PC board.

Citation: https://bestegoksites.bet

Free PCB Sunday: Pick your PCB

BP-600x373

We go through a lot of prototype PCBs, and end up with lots of extras that we’ll never use. Every Sunday we give away a few PCBs from one of our past or future projects, or a related prototype. Our PCBs are made through Seeed Studio’s Fusion board service. This week two random commenters will get a coupon code for the free PCB drawer tomorrow morning. Pick your own PCB. You get unlimited free PCBs now – finish one and we’ll send you another! Don’t forget there’s free PCBs three times every week:

Continue reading “Free PCB Sunday: Pick your PCB”

App note: Driving E ink segmented displays

an_renesas_e_ink

Application note on driving E Ink displays from Renesas. Link here (PDF)

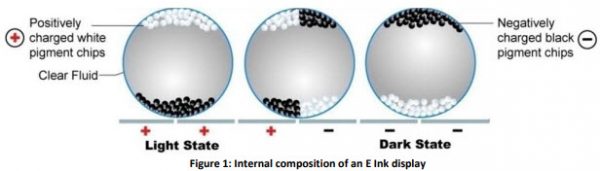
E Ink segmented displays are direct drive displays consisting of E Ink Vizplex Imaging Film sandwiched between two electrode layers, the top plane and the backplane, and then encased in an environmental barrier solution to protect the film and the segment electrodes. To get the most from E Ink segmented Displays, you need to be aware of proper design and implementation. Your reward will be sharp, precise images, a pleasant transition from one image to the next, and a long battery life.

Free PCB coupon via Facebook to 2 random commenters

BP

Every Friday we give away some extra PCBs via Facebook. This post was announced on Facebook, and on Monday we’ll send coupon codes to two random commenters. The coupon code usually go to Facebook ‘Other’ Messages Folder . More PCBs via Twitter on Tuesday and the blog every Sunday. Don’t forget there’s free PCBs three times every week:

Continue reading “Free PCB coupon via Facebook to 2 random commenters”

SQUIX ESP8266 based e-paper WiFi weather station

image1

Erich Styger documented his experience building Daniel Eichhorn’s e-paper weather station with a custom enclosure:

Using e-paper for a weather station is an ideal solution, as the data does not need to be updated often. By default, the station reaches out every 20 minutes for new data over WiFi and then updates the display. Daniel Eichhorn already has published kits for OLED (see “WiFi OLED Mini Weather Station with ESP8266“) and touch display (see “WiFi TFT Touch LCD Weather Station with ESP8266“). I like them both, but especially the TFT one is very power-hungry and not really designed to work from batteries. What I would like is a station which can run for weeks.

More details at MCU on Eclipse site.

PIC18 four-channel DMX relay controller

image1

Glen Akins has a nice build log on his four channel DMX-controlled relay, that is available on GitHub:

 Halloween was right around the corner and I needed a timer with a bunch of relays to trigger some store-bought props and a fog machine periodically. (Mental note: read fog machine specs carefully—not all come with timer remotes.) My first thought was an Arduino and cheap relay board. Second thought was to build something with a micro and some relays. Third thought was that if I’m going to build something, might as well add DMX and package it up into a neat enclosure. Hence, the four channel DMX-controlled relay project was born.

See the full post on his blog.

Building a Midi hat and jukebox using the Raspberry Pi

pi-midi-jukebox-final-600

Dr. Scott M. Baker has published a new build:

I picked up a Roland SC-55 to use with my retrocomputer setup recently, and I figured it would be cool to turn the thing into a standalone midi jukebox, so that no “computer” is required. I also figured this would be relatively easy, using a raspberry pi as the controller to drive the SC-55. My first step was to figure out how to get MIDI out from a raspberry pi. One option would have been to purchase a USB-MIDI adapter. This would have worked, but I really wanted to develop a native raspberry pi MIDI interface rather than using USB. MIDI is a fairly simple interface, and the raspberry pi has built in serial capability, so this ought not to be too difficult.

Project details can be found on Dr. Scott M. Baker’s blog.

Check out the video after the break. Continue reading “Building a Midi hat and jukebox using the Raspberry Pi”

Free PCB Sunday: Pick your PCB

BP-600x373

We go through a lot of prototype PCBs, and end up with lots of extras that we’ll never use. Every Sunday we give away a few PCBs from one of our past or future projects, or a related prototype. Our PCBs are made through Seeed Studio’s Fusion board service. This week two random commenters will get a coupon code for the free PCB drawer tomorrow morning. Pick your own PCB. You get unlimited free PCBs now – finish one and we’ll send you another! Don’t forget there’s free PCBs three times every week:

Continue reading “Free PCB Sunday: Pick your PCB”

App note: Grid-connected solar microinverter reference design

an_microchip_an1444a

A good read from Microchip on the theory behind inverter design connected to grip power. Link here (PDF)

There are two main requirements for solar inverter systems: harvest available energy from the PV panel and inject a sinusoidal current into the grid in phase with the grid voltage. In order to harvest the energy out of the PV panel, a Maximum Power Point Tracking (MPPT) algorithm is required. This algorithm determines the maximum amount of power available from the PV module at any given time. Interfacing to the grid requires solar inverter systems to abide by certain standards given by utility companies. These standards, such as EN61000-3-2, IEEE1547 and the U.S. National Electrical Code (NEC) 690, deal with power quality, safety, grounding and detection of islanding conditions.

App note: On-grid solar microinverter on Freescale MC56F82xx/MC56F82xxx DSCs

an_nxp_an4664

Application note from Freescale Semiconductor about microinverter solution develop together with Future Electronics. Link here (PDF)

In recent years, demand for renewable energy has increased significantly. The development of devices utilizing clean energy such as solar, wind, geothermal, and fuel cells attracts more and more attention. Solar energy harvesting is developing fast and will play a more important role as a global energy source. One of the ways to capture solar energy is via photovoltaic power generation systems, which are connected to the grid through power inverters. Therefore, many companies are focusing on development of photovoltaic grid-tie inverters. Freescale offers digital signal controllers, the MC56F8xxx family, that are well suited to ongrid solar inverter designs.

Feather M0 express supersizing

image1

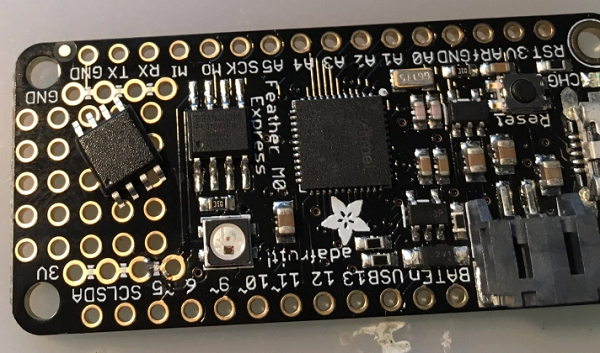
Dastels writes, “In my last post I described how I hacked a 2Mbyte SPI flash onto a Trinket M0 to give it the memory space for CircutiPython of one of the M0 Express boards. This time I supersized an M0 Express board, specifically a Feather M0 Express, although the same hack should work on a Circuit Playground Express.”

More details at Curmudgeoclast site.

Free PCB coupon via Facebook to 2 random commenters

BP

Every Friday we give away some extra PCBs via Facebook. This post was announced on Facebook, and on Monday we’ll send coupon codes to two random commenters. The coupon code usually go to Facebook ‘Other’ Messages Folder . More PCBs via Twitter on Tuesday and the blog every Sunday. Don’t forget there’s free PCBs three times every week:

Continue reading “Free PCB coupon via Facebook to 2 random commenters”

A digital communication project using OFDM and 32-QAM

1OFDM system

Tahmid blogged about a digital communication project using OFDM and 32-QAM as their ECE4670 final project:

This builds on a previous lab, where orthogonal frequency division multiplexing (OFDM) is used with on/off keying to send data over the channel. This scheme achieved a data rate of about 14,000 bits per second with zero errors, resulting in a figure of merit of about 14,000. The high performance design utilizes orthogonal frequency division multiplexing (OFDM) and quadrature amplitude modulation (QAM) to achieve a figure of merit much higher than the previous lab.
The overall OFDM system block diagram is shown below (taken from Professor Wagner’s course’s Scribe notes)

See the full post on his blog.

Pulse Oximeter functionality for a medical device

Pulse Oximeter on my finger-600

Alexander Lang writes:

The gentlemen for whom I’m developing this hardware for has requested some additional functionality. The additional functionality requested is a Pulse Oximetry measurement.  Pulse Oximetry is the measurement of a person’s pulse along with how much oxygen is present within their blood.  It is a common measurement made by medical practitioners to ensure their patients are in good health.  I suspect for the medical device, this information will be correlated with a person’s breathing to assess how well a person’s lungs are working and how much oxygen from the air is getting into their blood.

See the full post on his blog here.

Teardown, repair and analysis of an Agilent E4443A 3Hz – 6.7GHz PSA series Spectrum Analyzer

Teardown, repair and analysis of an Agilent E4443A 3Hz – 6.7GHz PSA series Spectrum Analyzer from The Signal Path:

In this episode Shahriar repairs an Agilent PSA Series Spectrum Analyzer. The instrument generates many errors during self-alignment and produces no measurements below 3.2GHz. The block diagram of the unit is thoroughly presented and various possible failure points are considered. Based on the observation of the noise floor, the most likely cause is the second LO module. The measurement of the LO power indicates that the second LO power is fall below nominal.

More details at The Signal Path homepage.

ZX81 internal 16K RAM (reversible version)

pZX81 testing-600

Dave Curran wrote a post on his blog showing how he upgrades the ZX81 internal 16K RAM with a reversible version:

One of the common issues with the ZX81 is the good old RAM pack wobble. Depending on the state of your edge connectors on your ZX81 and RAM pack, it sometimes does not take much to interrupt one or more connections and crash the ZX81.
To get around this, I have done many ZX81 internal RAM upgrades, following the procedure I described in an old blog post – ZX81 Internal 16K RAM.
I had a request to do one of these, but to do it in a reversible manner, without cutting tracks.

See the full post on his blog- Tynemouth Software.